
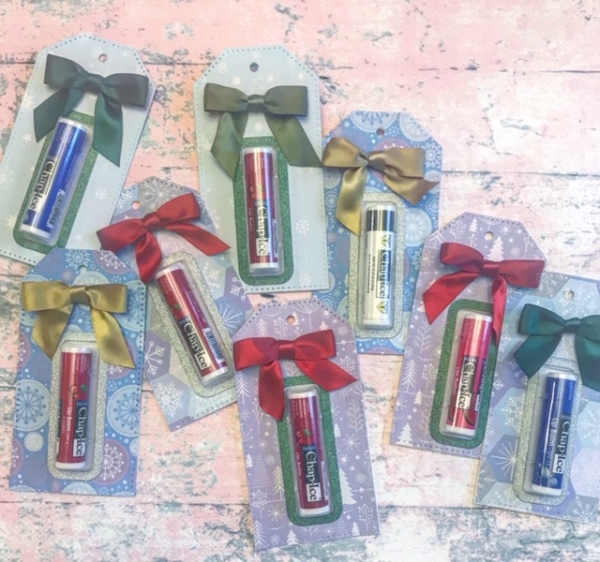

I have a quick and easy gift idea I wanted to share. Each year at the holidays, I always give out hand sanitizer and lip balm along with my gifts as a little extra something. I have been doing it for years. I thought this year I would decorate the lip balm by attaching it to a tag to make it even more fun and festive!
First, you’ll need to decide what type of base shape you want to use. You can use squares, rectangles, tags, bookmarks, banners, etc. I decided to use the Sizzix dotted tag from the Stamps of Life. I used the largest die for this project. The main lip balm dies are from MFTtamps. They are very inexpensive and they are called Die-Namics Lip Balm Window (2 piece set).
I also used beautiful pre-tied bows from Anna Griffin which I ordered from HSN. I thought this would be faster (and neater) than me trying to tie that many bows. I bought the lip balm pouches from MFTStamps. They are also inexpensive and really adds a finished look to this project. I ordered a bunch of lip balm on Amazon, but you can use whatever brand or flavor you prefer. Other than some wet glue and double sided tape, those are all of the supplies you will need!
Onto the project….. first I cut out tags in white cardstock (backing) and then I cut out a corresponding number of tags in the same size but this time in holiday patterned paper since this will become the front of the project. The patterned paper I used was from the Stamps of Life and Crafter’s Companion. After cutting the basic tag shapes, I used the frame die to cut out sparkly frames that would match the tags. I love the Crafter’s Companion glitter paper. The glitter doesn’t rub off and the paper is so sturdy.

Next I used the smaller of the two dies to cut a hole in the patterned paper tags. You can place the die wherever you like. Once all of them were cut, I was able to move onto assembly.

As you can see, I glued the frames onto the patterned paper tags. I used wet glue for this. Next, I added double sided tape to the TOP of the edges of the lip balm pouch (see above). I then pulled off the top of the tape and placed the pouch in the hole of the tag from underneath – that’s why the tape went on the top. This firmly secures the pouch to the top layer and you don’t see any edges because they are covered by the glitter frame. I added my lip balm and glued the front tag onto the white tag with wet glue. The last step was to add the ribbons. You could really add any embellishments you like or even a sentiment if you prefer.
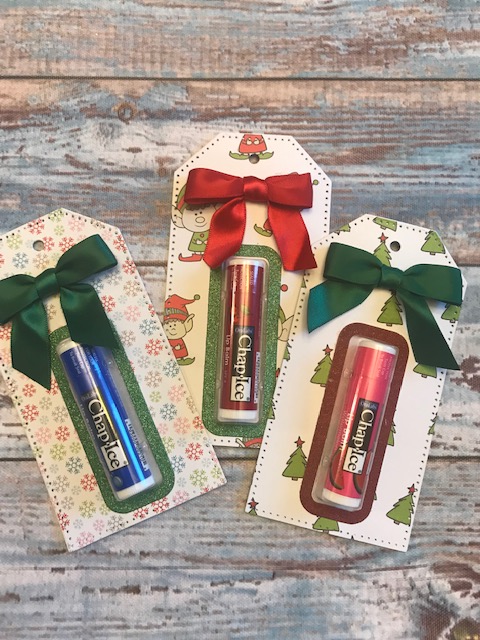

I really LOVE how these tags turned out and they were quick to make once I had a plan. They look so nice I hope my recipients will want to open them!
Thanks for stopping by and I hope you give this project a try!! I promise you won’t be disappointed. Share if you do give it a try – I would love to see your creations! Happy Crafting!

Love this idea… they’re so cute! I need to check out that die!
LikeLiked by 1 person
Thanks so much Leslie!! They were super simple to make and they are really cute too!
LikeLike